Edit
The editor
A recording opens here with its zooms already added. Tools on the left, the picture in the middle, the timeline below, and every tool one key away.
1 min readImprove this guide
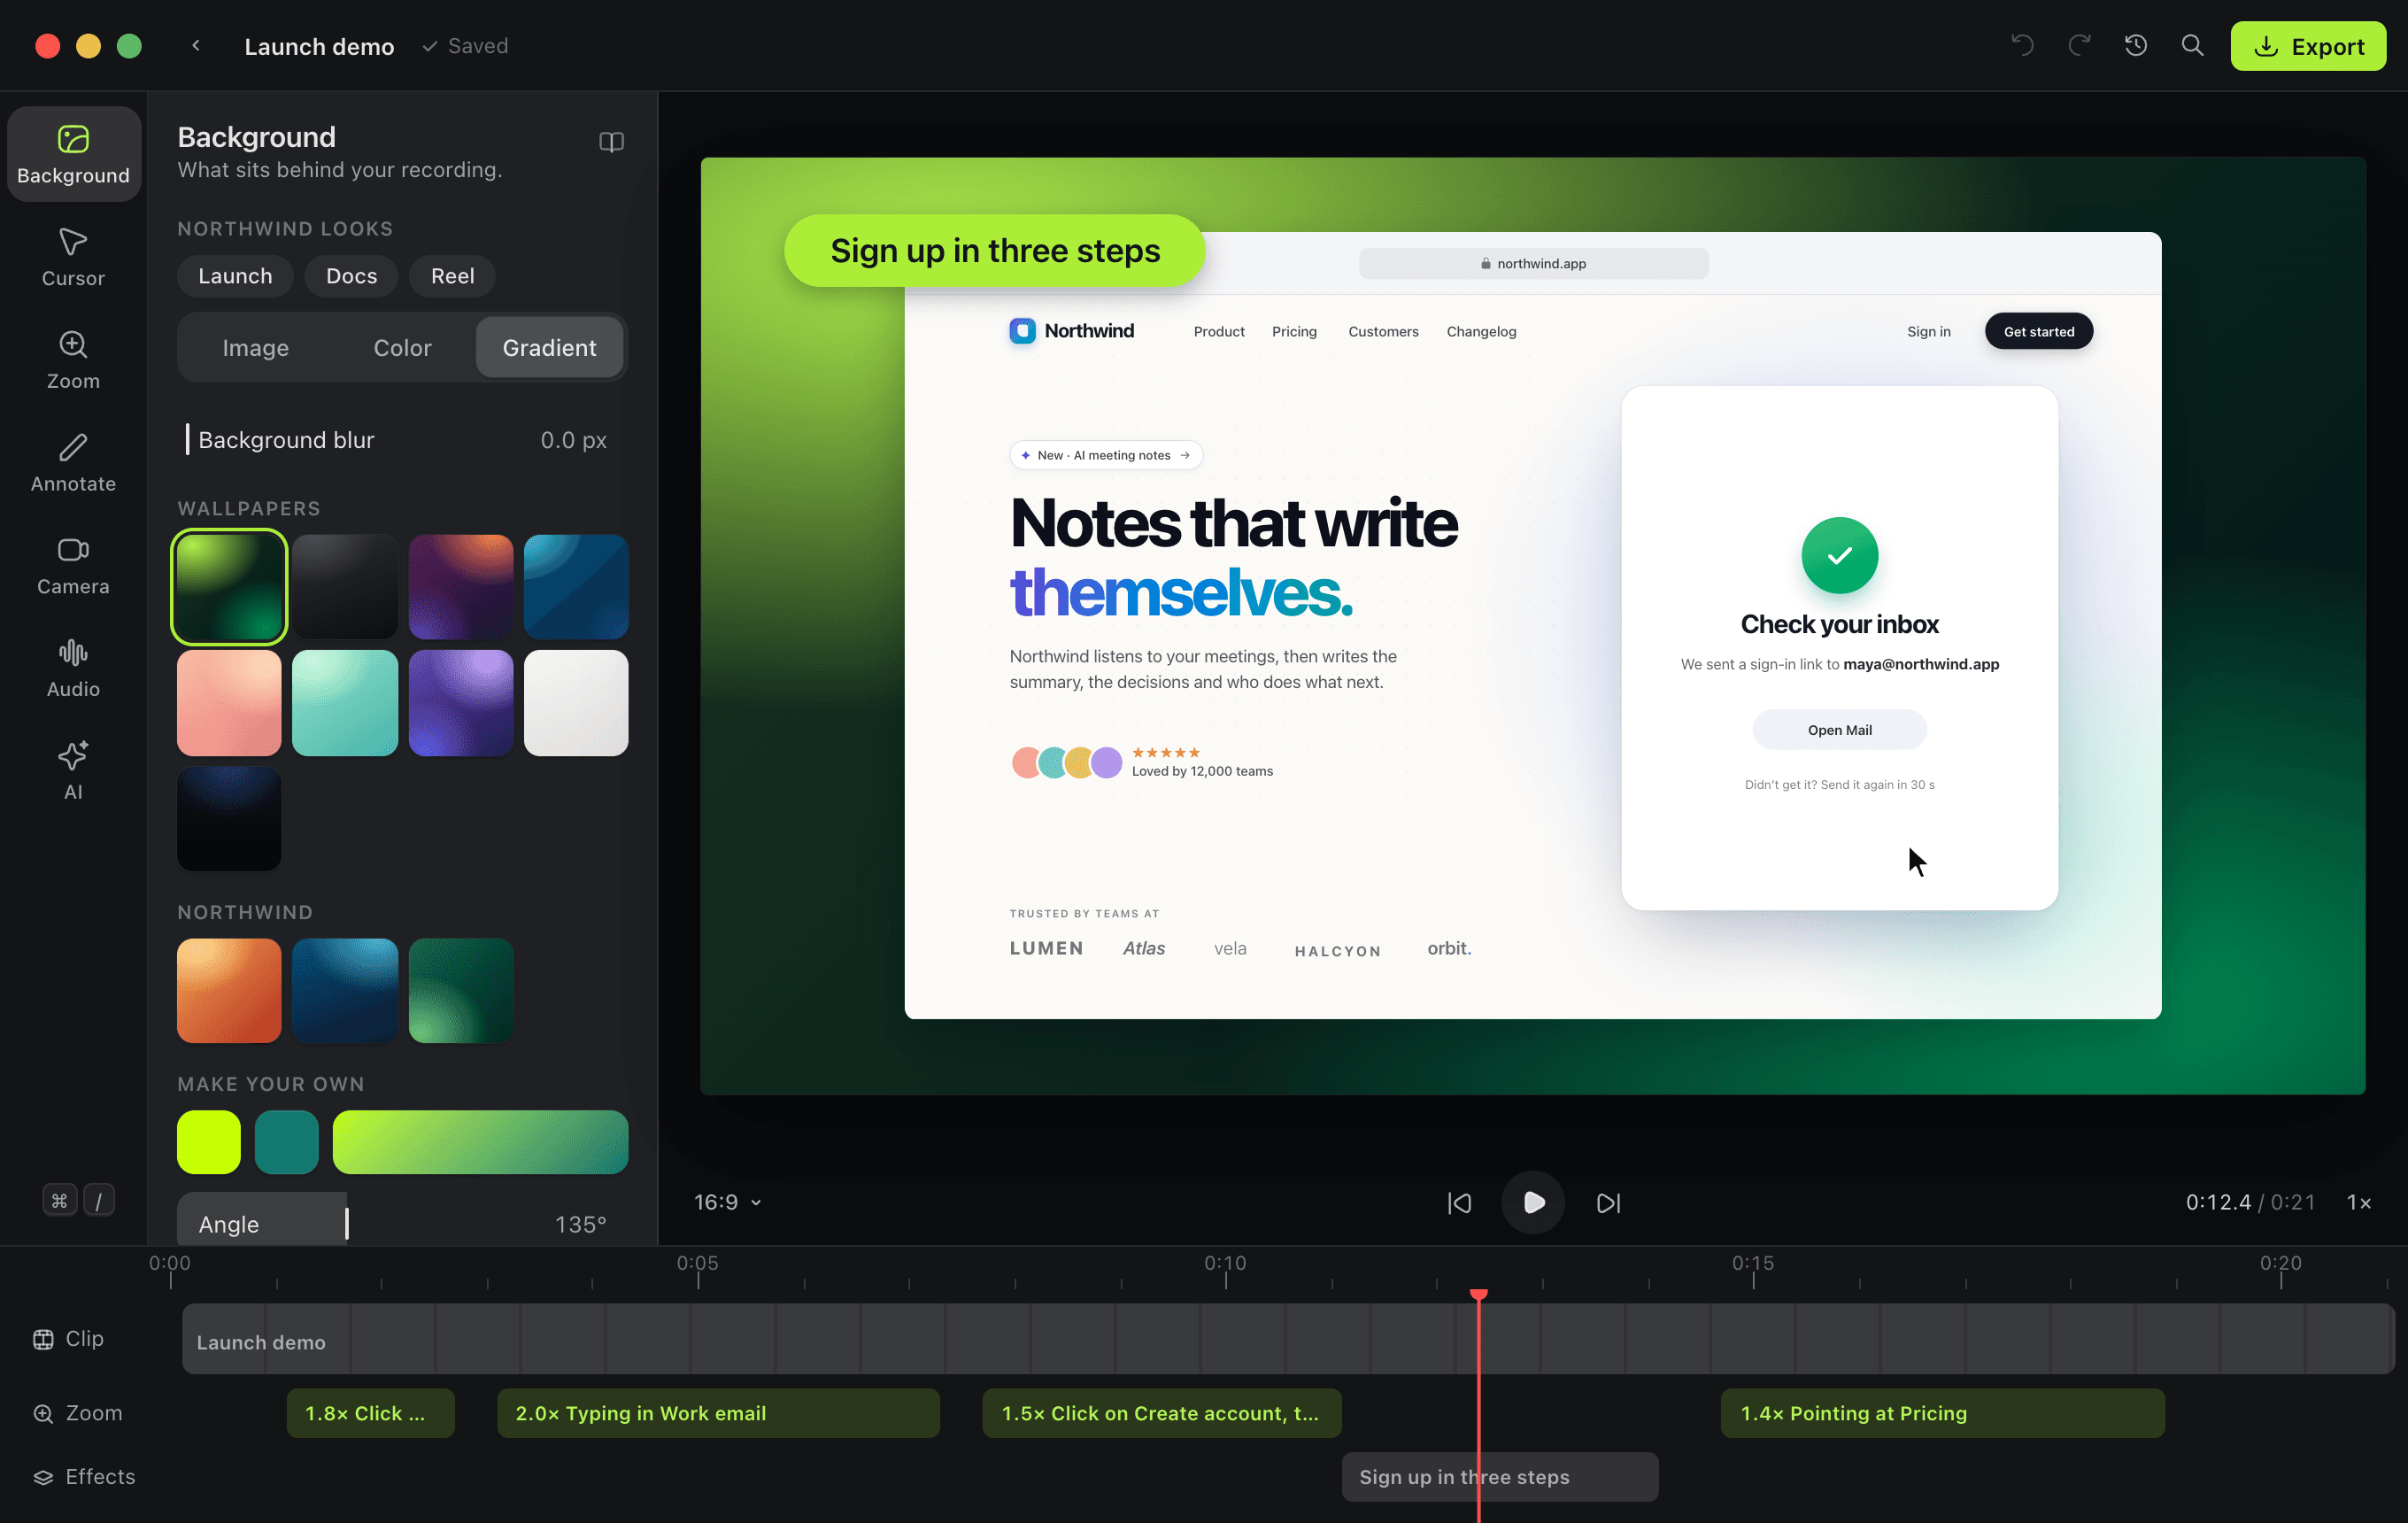
The tools
Press a number to open a tool:
| Key | Tool | What it does |
|---|---|---|
| 1 | Background | Wallpaper, padding, corners, shadow and the video's shape |
| 2 | Cursor | Size, smoothing, style, click effects, spotlight, motion blur and click sounds |
| 3 | Zoom | Auto zoom, how far and how smooth, and the zooms in the video |
| 4 | Annotate | Titles, arrows, blurs and keystrokes |
| 5 | Camera | The camera bubble's shape, size and corner |
| 6 | Audio | Voice cleanup, silences, voice-overs and music |
| 7 | AI | Captions, made on your computer |
A screenshot has two tools: Background (1) and Annotate (2).
The timeline
- Space plays and pauses. J goes back, pauses or goes forward. ← and → step one frame, and Home goes to the start.
- S splits the video at the playhead. Select a part you don't want and press ⌫.
- Z adds a zoom at the playhead. Drag a zoom's edges to change it.
- Titles, arrows and blurs are blocks too: drag one to change when it shows.
- The speed menu next to the transport plays the preview at 0.5×, 1×, 1.5× or 2×. It doesn't change the video.
Undo, history and the tour
- ⌘Z undoes and ⌘⇧Z redoes.
- Every change saves itself. Version history (⌘⌥H) shows the earlier versions, so you can go back to one.
- ⌘K opens the command palette: every action, by name.
- ⌘⇧T starts the tour, and each tool's Show me how this works explains it in place.
When it looks right, press ⌘E to export.
Put it to use
- Product demosRecord your product once and Shotmaxxing adds the zooms, smooths the cursor and frames it on a background. Free and open source, for Mac.
- Screen Studio alternativeShotmaxxing is a free, open-source Screen Studio alternative for Mac: automatic zooms, a smooth cursor, beautiful backgrounds, and AI agents that can film the demo for you.